
Create a QR code for your event
Download a QR code that opens your event gallery, and put it on screens, tables or invitations for guests to scan.
On this page9 sections
A QR code lets guests open your event gallery straight from their phone camera, with no link to type. Put it on screens, tables or invitations, and guests can find their photos with a selfie, even while the event is still going on.
Before you start
- An event in your dashboard. New to TurtlePic? Start with Create your first event.
- Decide whether guests should see every photo, or only the photos they appear in.
Open Share event
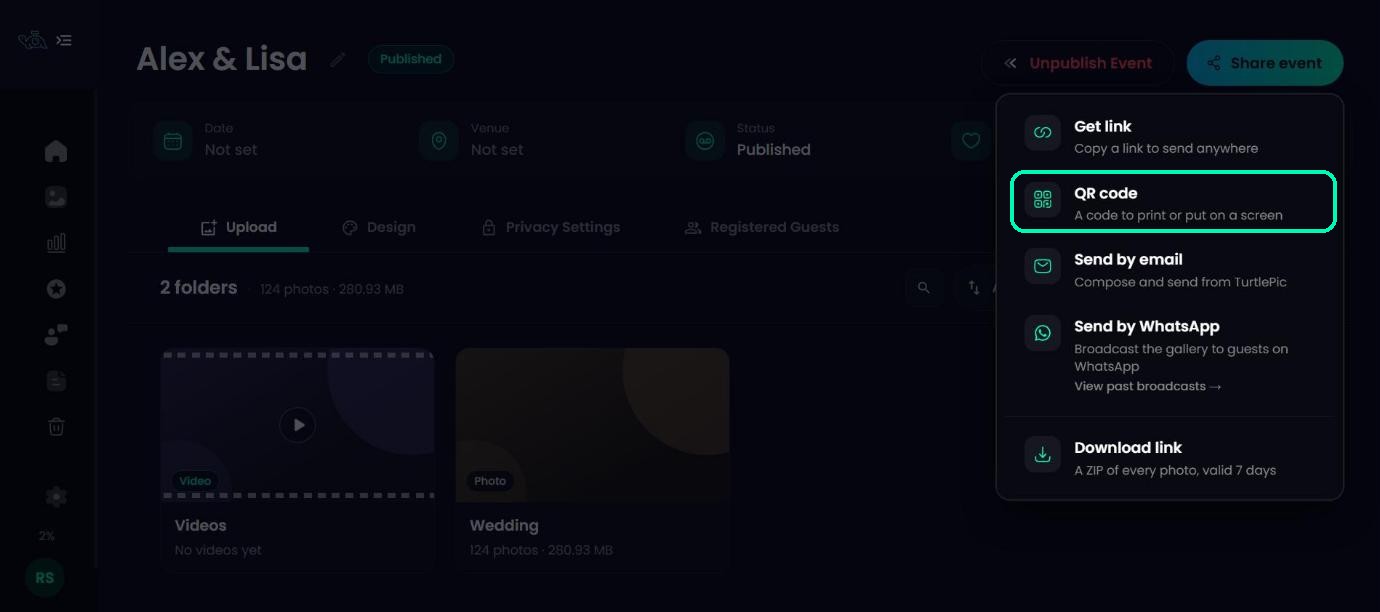
Open your event and click Share event at the top right. In the menu, choose QR code.
Choose what guests can see
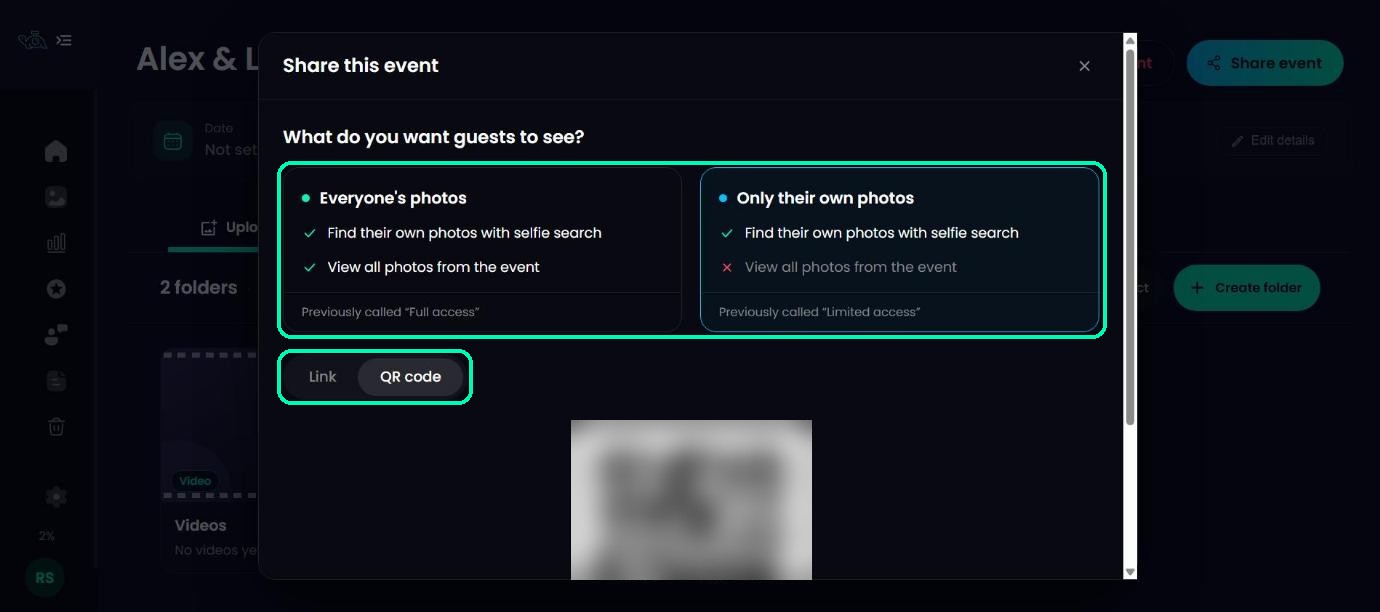
At the top of the window, pick who sees what:
- Everyone’s photos – guests can browse the whole gallery.
- Only their own photos – guests see just the photos they appear in, after a selfie.
The QR code updates to match your choice.
Tip
For weddings and private events, Only their own photos keeps each guest’s view personal. For conferences and public events, Everyone’s photos lets people browse freely.
Download the QR code
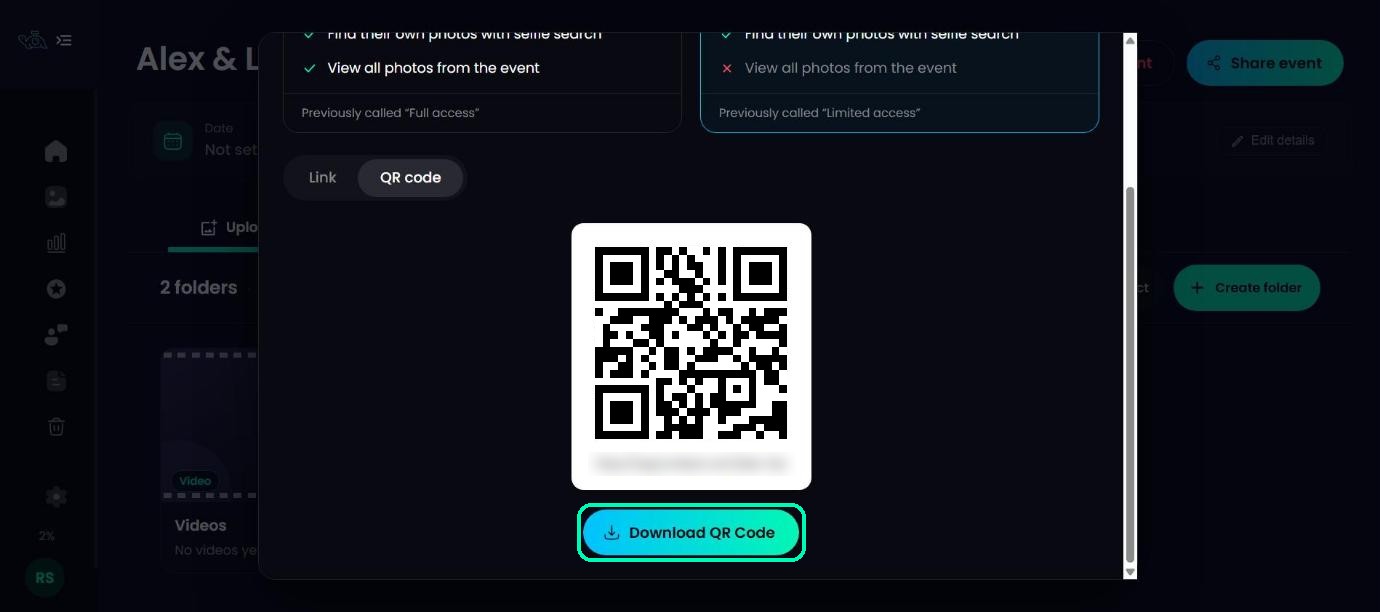
Make sure the QR code tab is selected, then click Download QR Code. It saves to your computer as a PNG image. The gallery link is shown under the code too.
Tip
Your QR code stays the same even if you rename the event, so you can print it early and reuse it.
Put it where guests will see it
Add the image to anything guests will look at during or after the event:
- Table cards, standees or posters at the venue (add the image in your usual design tool, such as Canva).
- The LED wall or screens at the venue.
- Invitations, thank-you cards or the event’s social media posts.
Tip
Before you print, scan the code with your own phone to check it opens the right gallery. Print it big enough to scan from where guests will stand.
Publish before guests scan
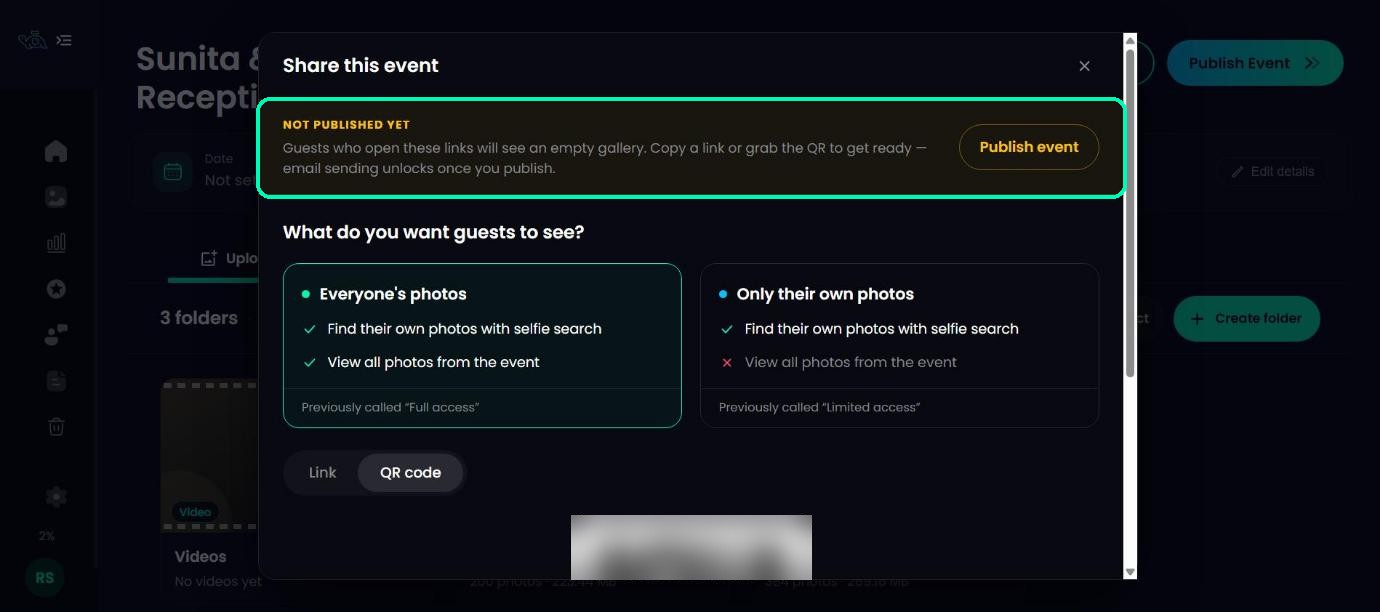
If your event is still a draft, you’ll see NOT PUBLISHED YET in the share window. Guests who scan now will see an empty gallery. Click Publish event in that warning (or Publish Event at the top of the page) before the event starts, and keep uploading photos as the day goes on.
What guests see when they scan
The code opens your event gallery in their phone’s browser. There’s no app to install. They tap Find my photos, take a selfie, and TurtlePic shows every photo they appear in.
Sharing from your phone
In the TurtlePic mobile view, Share event → QR code opens the same code in a panel at the bottom of the screen, with your phone’s own share options.
What’s next
- Share your event link with guests
- How guests find their photos with a selfie
Was this article helpful?
Your answer helps us improve this guide.
Thanks for letting us know.